Monday, April 20, 2020

Gaslands terrain

So after getting bit by the Gaslands bug and searching the interwebs far and wide, I haven’t found much about making terrain. Everyone’s about making cars. That’s cool cause you need cars to play. But you also need a racetrack/battle arena. As there is a lack of building Gaslands terrain information on the webs, I figured I’d show ya’ll how I’m doing it.
I have to start out with that I love making terrain. I’m not that good at it, but I still enjoy it. Even as much as painting miniatures and playing the games. Building terrain lets my imagination run wild and I can make whatever I want (usually with whatever supplies I have on hand).
For me at least, having decent painted miniatures and decent painted terrain is part on the game. So without further ado-here is Gaslands terrain:
I used all of the skills and techniques that I learned many years ago building 40k terrain.
I used the cheapo foam board from Dollar Tree. It’s the best because it’s crap. The paper backing is very thin and peels off easy, which is what I want. I peel off both sides of that thin, crappy tissue paper revealing a nice thin piece of foam. I cut it into the shape I want with a Exacto blade with ease. Then I trace around that shape onto some thin card stock. The box that your beverages came in is perfect for this (you didn’t throw that away did you?)
I then glue the foam to the matching card stock. I like Gorilla Wood Glue. It has a very strong bond and I always like to protect my terrain against armor piercing dice. I put these base assemblies under a weight for a couple of hours to keep them from warping. 
After they’d cured enough, I went on with business. I took the cheapo dollar store cars (four for $1), that I’d smashed with a hammer, and pushed them into the soft foam of the base.
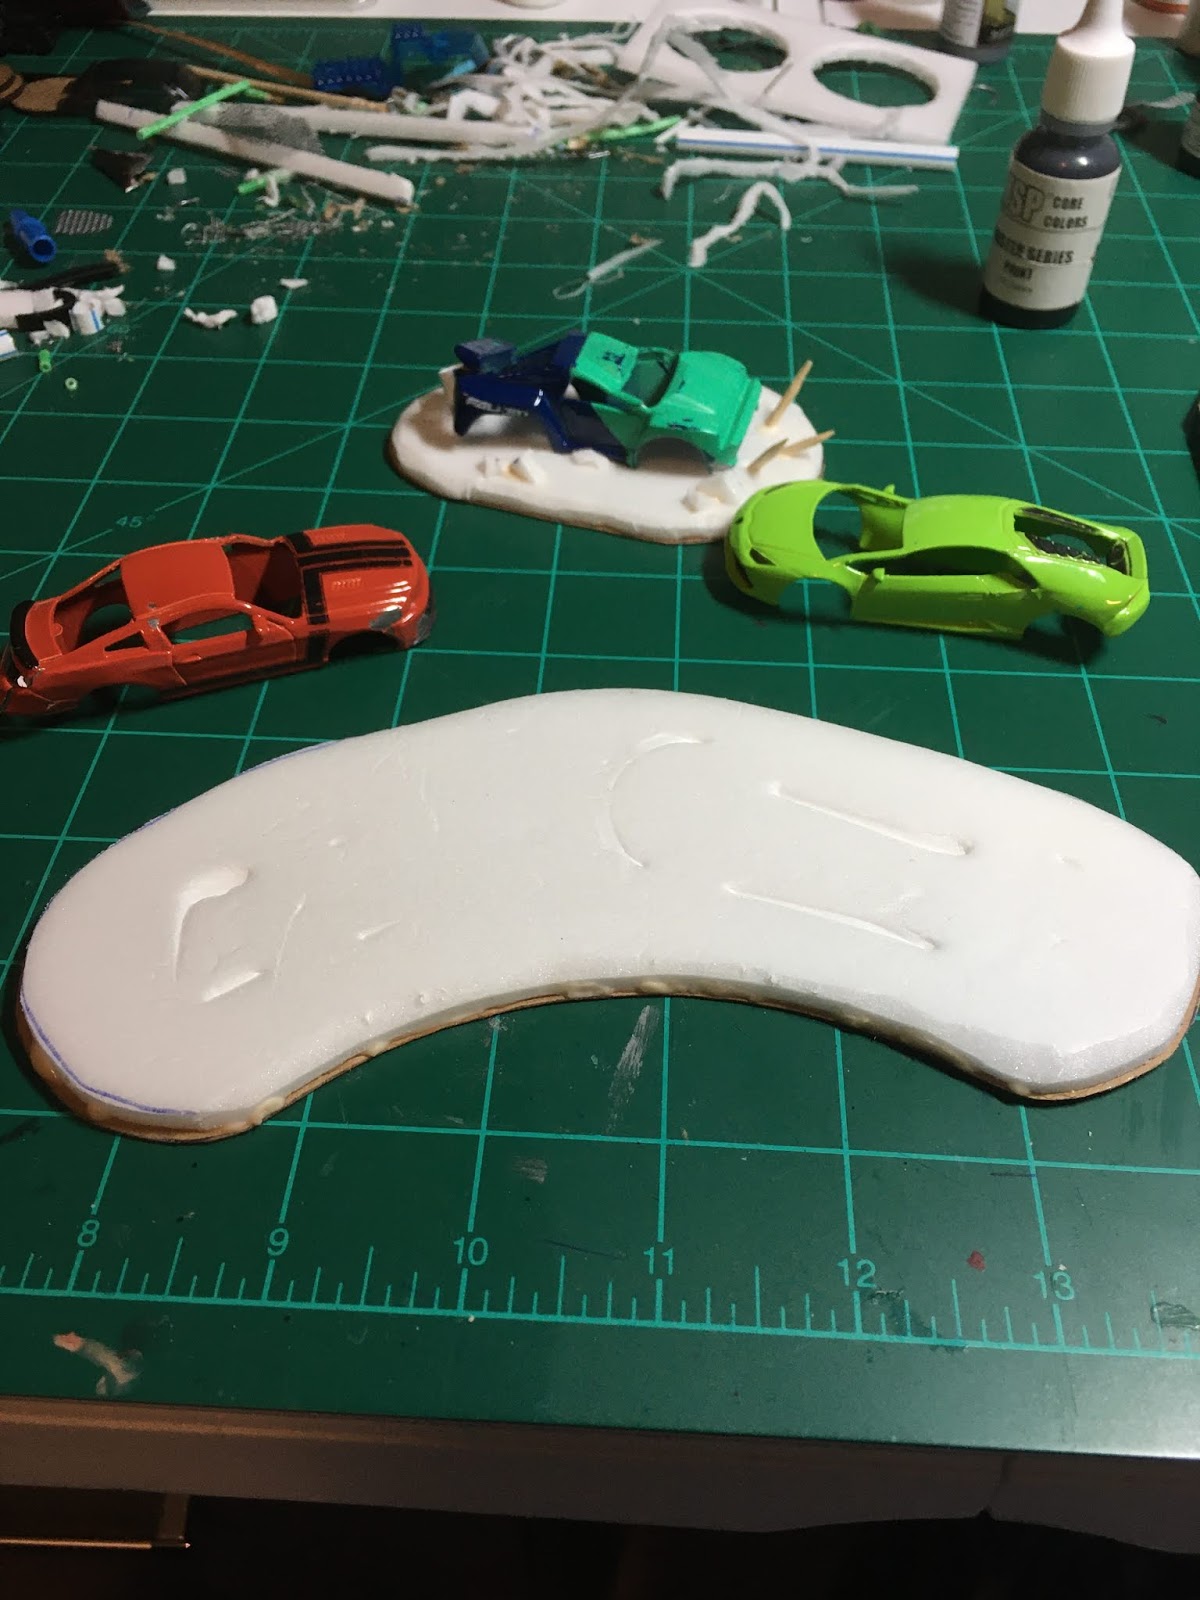

The impressions told me were I needed to put the glue to get them secured to the base. Where the two cars touched, I used super glue.


I beveled the edges of the base. I then used some foam drop offs, bits of straws (for pipes), and carved toothpick spikes for some details.
Glue on some sand and wait for it to dry 

Next time we’ll look at details and paint. 
Till then be safe and stay healthy!

Saturday, April 11, 2020

Entering the Gaslands

So over the last month l’ve been painting seven beastmen to go with the Khornate champion I painted a couple of years ago. I digress, this post isn’t about them. They’ll get their own for reasons...
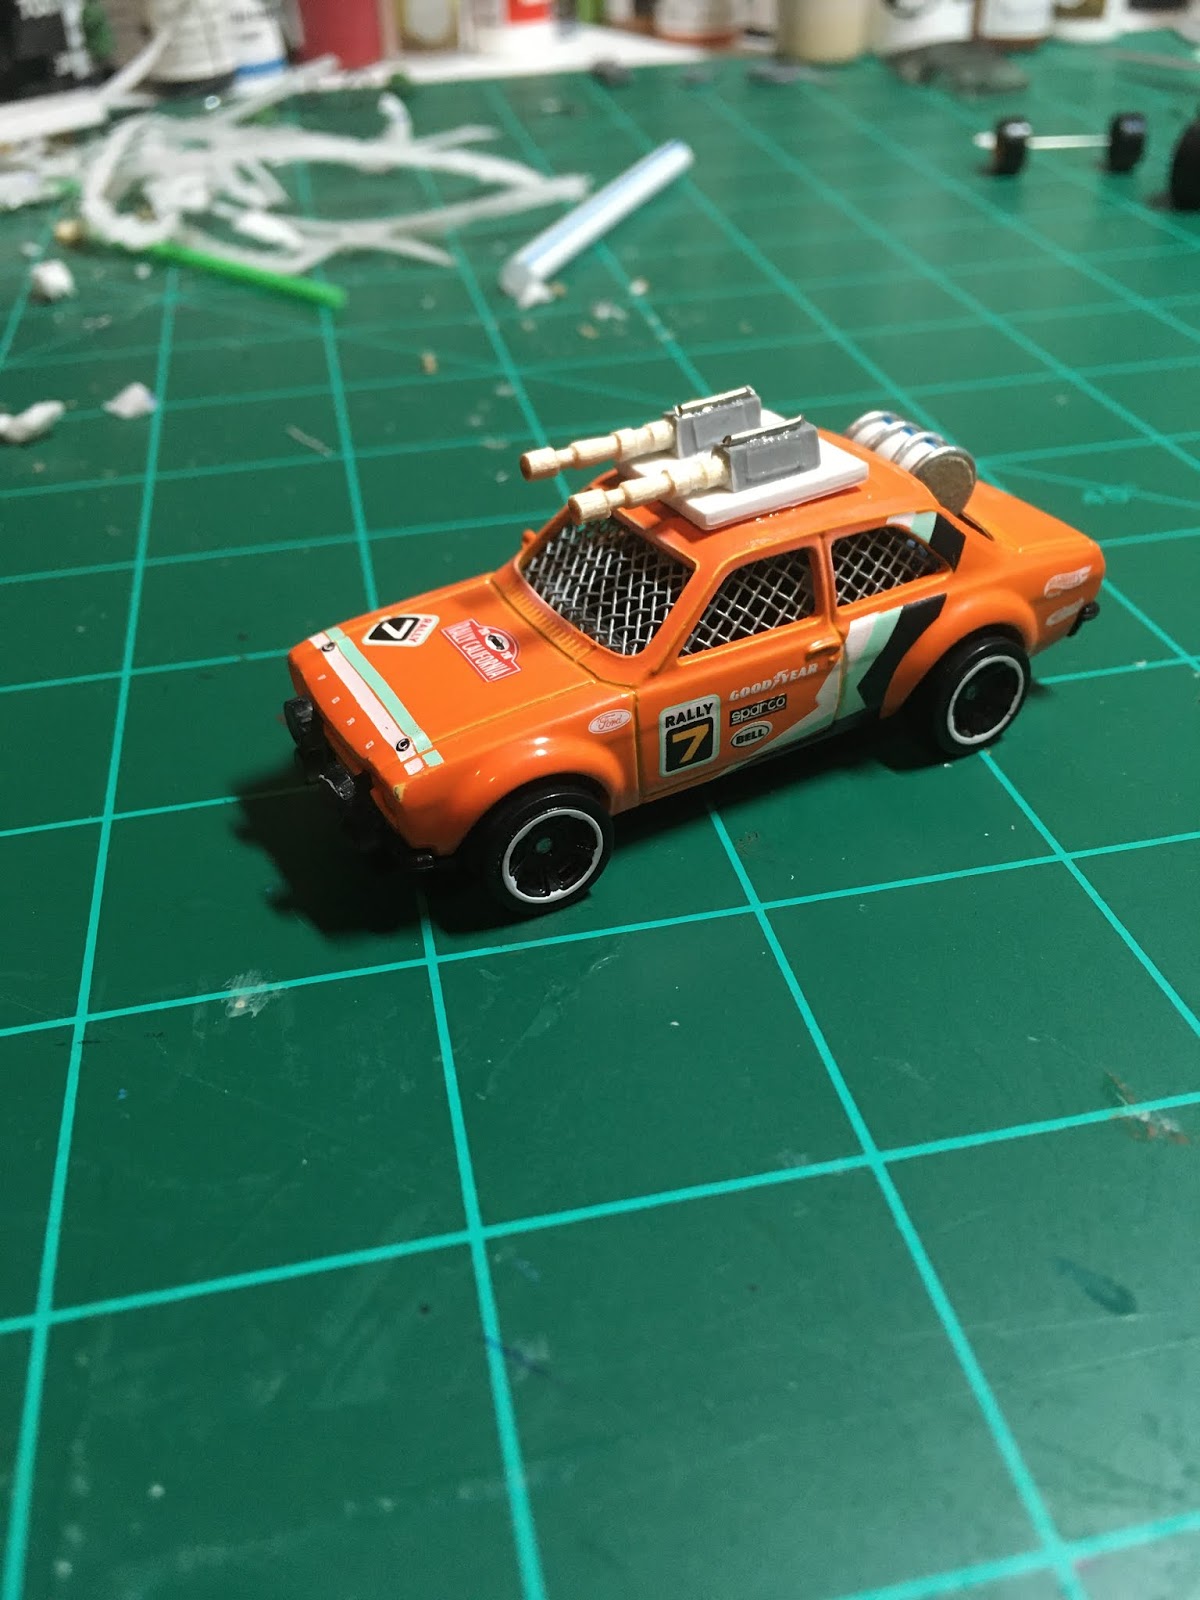
This is my inaugural Gaslands post! My local dollar store had Hot Wheels on sale for 2 for $1. And I just couldn’t look that cheap miniature gift horse in the mouth. So I bought 30+ cars for less than you could even look at something made by GW. I then ordered the rule book and a couple of sprues of parts from http://www.northstarfigures.com/. Much to my surprise, the rule book was hardback and of very good quality. And even with this covid-19 crap going on the shipping time from the UK to the good’ol USA was not too bad. I’m impressed, those guys have great customer service!
Reading through the rule book it definitely has an old hammerish diy feel to it. And it gives me an opportunity to make a bunch of new stuff in a new scale. I figured I’d do some tutorials on how I’m making things for this new project. I suck at battle reports so we’ll see on that.
Anyway, here’s how to make some car mounted guns on the cheap:
I start out with a Diamond brand extra long toothpick 
And cut it down to length. The none pointy end has some nice details to it. Then I cut off a small bit of sprue and square it up with a file. We’ve all got some of this hanging around, don’t we? (You paid for it when you bought those plastic miniatures. Never throw away your money.) I then drill a 1/16” pilot hole in the middle of the sprue bit.

Be fairly precise with this because you won’t have much room in the next step. I used a 3/32” drill bit to make a counter sink for the toothpick barrel to sit in.
Now glue the toothpick barrel into the sprue bit. Refer to the first picture. For added details a bit of paper clip across the top of the sprue receiver and some plastic bits for the side plates of the receiver and the front sight.
They were made from a 1/16” strip cut from the blister that the hot wheel came in. (You didn’t throw that away, did you?) Triangles for the front sights and rectangles for the side plates.

Maybe when the car is closer to being done I’ll route a zip tie belt feed. I also want to do a tutorial on the auxiliary fuel tank. 
Until next time, stay healthy and stay safe. 

Saturday, February 29, 2020

Banners (part 1)

This is going to be the first in a series about making banners. The old school way. Back in the ‘90s GW sold banner stickers in blister packs. While it was a fast and easy way to make banners, it was very boring. I mean, who wants their flags to look like the other guy’s? Back then color printers were hard to come by and 3D printing was science fiction. Plus, you want your stuff to have soul and art and stuff, don’t you? 
If you’re seeing this before you’ve checked out Orlygg’s awesome series of posts on banners, you should definitely check it out: http://realmofchaos80s.blogspot.com/2013/05/arcane-armorials-constructing-oldhammer.html?m=1
Basically, the only real difference between me and Orlygg is the raw materials used. I like to use aluminum cans because it was and is very common and accessible then and today. “Tall boys” are perfect because they give you lots of material to work with. I start by cutting the top and bottom off with some shop scissors.
After the the top and bottom is cut off, cut the cylinder long ways.
Don’t worry about being precise here, that comes later. And here it comes.
Take a straight edge and a sharp blade and cut the can into smaller rectangles. I went with 2” x 4” for army standards and 1” x 2” for unit standards.
The size and shape is really up to you. We’ll be getting into that in the next episode on banners so stay turned and let’s see where this takes us.

Friday, February 28, 2020

New digs

Moved the set up from the kitchen to the office.
Much to my girlfriend’s delight!

Monday, February 24, 2020

Do you even dungeon bro? (Part 1)

My dungeon crawl project started on February 2 2019. It’s been quite the journey and more than a year into it, I have amassed some tiles. This post is a year in the making so I’ll try to remember it all as best I can. Please join me and let’s get down, you dungeon degenerates:

My girlfriend and I made some test pieces to prototype with. My girlfriend made this piece. It is by far the best one from our efforts.

I think the brick work is excellent. I failed to produce anything close to this. She used a ballpoint pen and drew directly onto a piece of 1/2” foam. Sadly this was the only one she made.

The floors are 1” thick foam cut into 12” x 12” squares. The walls are 1/2” thick foam 3” tall.

I tried to glue the exterior walls on top of the floor but this was way too fiddly and kept falling apart. I ended up gluing the walls to the side of the floor. If that makes sense? Much more stable and very solid. It wound up making the walls 2” high. Which is about perfect for being able to reach miniatures on (in?) the tile. Here’s one of the first ones.
 

The first group had hand drawn flagstones or bricks. Adding interior features such as walls, stairs and   other stuff really brings the tiles to life. Painted black then dry brushed grey. More shots of the WIP.
After our first game on these tiles I figured it would be a lot more interesting if they had doors! So I set about making some to add to them.


The next batch that I made were built a little different. I made the walls with built in doors added texture with glued on sand. Hand drawing all those flagstones is labor intensive! 

Admittedly, they are a bit generic but do add a maze like feel to the experience. It maybe hard to see in these pictures but there is green blotches painted into the floor. This is to represent dungeon slime making these tiles more dangerous to the unwary adventurer.
Almost done degenerates, one more tile for this post! This one is something that I have wanted to make since the beginning of my Warhammering way back in the day. A terrain piece with a giant Chaos Wheel!

I want to do a post later on just on this tile.

Saturday, February 15, 2020

Tiny head, hairy legs

So this guy is a solid throwback straight before 3rd WH. His tab has 1985 on it. Let me think for a minute and I could probably come up with some scenario why he has the mutations. I guess I’m too intoxicated to come up with something right now. Here he is:

I don’t know who sculpted this Minotaur but whoever it was had a thing against proportions. The tiny head and big giant hands, upper body is gigantic. It’s actually a great model and fits very much so into the whole Realms of Chaos stuff from the late 80’s. I painted the small head and furry legs strawberry blonde. The upper body is different shades of P3 Bootstrap Leather. The hands, muzzle and tail are a fleshy color. I made the tail bright to make it seem like it could be prehensile.

Anyone know who sculpted this buff beast of a Minotaur?

UPDATE: Stuff of Legends is an awesome site. This Minotaur is C25 series and his name is Bhovus. Sculpted by Nick Bibby.

Monday, February 3, 2020

Behead the Gorgon

Xuezea stepped around the pillar of the ancient and decaying temple. The ignorant man that had come here had no idea what he was facing. His gaze met hers and in an instant he was now one of the many stone statues that littered the temple floor.
The title of this blog post is in reference to the song Behead the Gorgon by the band Lair of the Minotaur.
https://youtu.be/-S9HWMdNnO4
The miniature is from Otherworld Miniatures
https://otherworldminiatures.co.uk/
 If you haven’t bought anything from them yet, you should. What are you waiting for? They make some excellent miniatures in an old school style. (I am in no way affiliated, employed, sponsored, paid, or compensated for my endorsement of this company). They make good stuff, ‘nuff said.
I’m not so happy about how her dress turned out but her skin looks dope in real life. She’ll make a great enemy for my players. Good thing their main characters just got some magic weapons. Their henchmen on the other hand are definitely going to have a very tough time.

Gaslands terrain

 I like to pop into my local dollar store every now and then to see if there is anything new that I can use gaming projects. Some crap found...